
Duplicate values in Excel are one of those problems that look harmless until they ruin something important.
Maybe it’s a list of email addresses, customer IDs, invoice numbers, product SKUs, or exported data from another system. At first glance, duplicates feel like clutter. But the real issue is what happens next: totals become inflated, PivotTables lie, and any reporting built on top of that data becomes unreliable.
The good news is that Excel gives you multiple ways to remove duplicates. The bad news is that many people use the wrong one for the situation and accidentally delete data they still needed.
In this guide, I’ll show you how to remove duplicates safely, how to keep control over what gets removed, and how to avoid common mistakes that cause data loss.
First: Know What “Duplicate” Means in Excel
Before you delete anything, get clear on what counts as a duplicate.
In Excel, a duplicate can mean:
- A duplicate in a single column (example: the same email address appears twice)
- A duplicate row across multiple columns (example: same first name + last name + company)
- A partial match (example: same customer but different order ID)
Excel’s “Remove Duplicates” tool doesn’t guess your intent. You choose the columns that define what a “duplicate” is.
That decision matters.
Method 1: Remove Duplicates Using Excel’s Built-In Tool (Fastest)
This is the most common and quickest method, and for most datasets it’s the correct starting point.
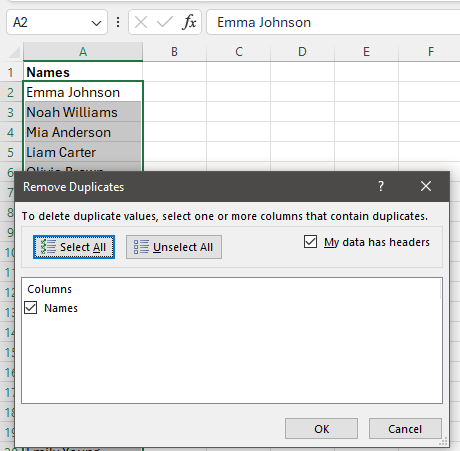
- Click anywhere inside your data range
- Go to the Data tab
- Click Remove Duplicates
- Select the columns Excel should use to detect duplicates
- Click OK
Excel will remove duplicate rows and tell you how many were removed. This works great when:
- You want one clean list immediately
- You trust the data structure
- You don’t need to keep a record of removed entries
But there’s a catch. Once you click OK, the duplicates are deleted. They’re gone. So you need to be sure you are removing the correct ones or if it didn’t autosave, reopen the file.
The Safer Way: Convert Your Range Into a Table First
If you’re cleaning real data, doing it inside a Table is usually the smarter move.
Tables make your data easier to manage because:
- Columns stay consistent
- Filters are built-in
- New rows automatically follow the structure
- It’s harder to “miss” part of your dataset
If your list isn’t already a Table, this is worth doing first. We’ve made a step-by-step guide on how to create tables in Excel. Once your data is in a Table, removing duplicates becomes less risky because you’re far less likely to select the wrong range or forget columns.
Method 2: Remove Duplicates From a Single Column (Without Breaking Rows)
This is a common trap. Let’s say you have:
- Column A: Customer Name
- Column B: Email Address
- Column C: City
If you “remove duplicates” using only the Email column, Excel will remove entire rows that share the same email. That might be correct, or it might delete important information tied to those records. So if your goal is “one unique email list”, the safer approach is:
- Copy the email column to a new sheet
- Remove duplicates there
- Keep the original dataset untouched
This gives you a clean unique list without destroying your source data.
Method 3: Highlight Duplicates Before Removing Them (Best for Validation)
Sometimes you don’t want to remove duplicates instantly. You want to see them first. This is especially important if duplicates may be legitimate, for example:
- A customer appears twice because they placed two orders
- An employee appears twice because they have multiple roles
- A product SKU repeats because it appears in multiple categories
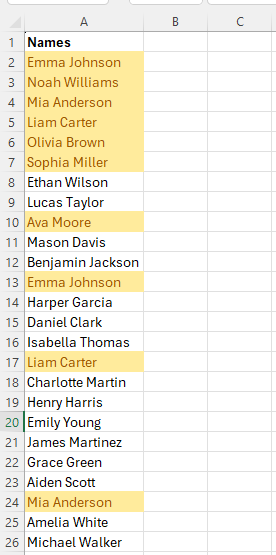
To highlight duplicates:
- Select the column you want to check
- Go to Home → Conditional Formatting
- Choose Highlight Cells Rules → Duplicate Values
Excel will visually mark duplicates, so you can inspect the data before deleting anything. This is slow compared to auto-removal, but it’s safer when the dataset has edge cases.
Method 4: Remove Duplicates With a Formula (When You Need a Dynamic Result)
There are situations where deleting rows is the wrong approach. For example:
- Your dataset updates every day
- You’re pulling data from another sheet
- You want a clean unique list without modifying the source
In those cases, a dynamic formula-based unique list is the best solution. Modern Excel includes functions that can return unique values automatically. This means you can build a clean output list that updates whenever the source data changes, without touching the source dataset. If you want, we can do a dedicated post on “How to create a unique list in Excel” because it’s a separate (and very searchable) topic. Let us know in the comments!
The Biggest Mistake People Make When Removing Duplicates
Here’s the veteran mistake I see constantly: People remove duplicates after building formulas, reports, or PivotTables. That’s backwards. When you remove duplicates after the fact:
- totals shift
- references break
- reports become inconsistent
- “why did my numbers change?” becomes a headache
The right workflow is:
- Clean the data
- Validate the structure
- Build your report
Removing duplicates is a data-cleaning step, not a finishing step.
Final Thoughts
Removing duplicates in Excel is easy. Removing duplicates correctly is the part that matters.
If you just need a quick cleanup, Excel’s built-in Remove Duplicates tool is perfect. If the data matters, use a Table first, verify duplicates visually when needed, and avoid deleting rows from your only copy of the dataset.
A clean dataset is the foundation of every good spreadsheet. Get this step right and everything else becomes easier.